When I started my career as a shaft supplier, I quickly learned that one of the most common mistakes new customers make isn’t about choosing the right material or finish—it’s measuring the shaft diameter wrong. I’ve sat across from machinists, mechanical engineers, and even small business owners who’ve ordered the wrong part because they grabbed a ruler and guessed at a measurement, or used a tool that wasn’t made for the job. Today, after 12 years in this business, I want to walk you through how to measure a shaft diameter correctly, the tools you actually need, and the pitfalls that even seasoned folks trip over. Let’s get into it. Shaft

First, why does this matter? A shaft’s diameter isn’t just a number on a spec sheet. It’s what keeps a pulley aligned, a bearing spinning without play, a gear from slipping off, and a motor running at the right speed. If you measure wrong, you get a shaft that’s too loose (it wiggles, wears out fast, and could break under load) or too tight (it won’t fit at all, or seizes up after just a few hours of use). I once had a customer— a small farm equipment repair shop—call me panicking because they installed a replacement shaft on a hay baler, and it snapped on the first pass. Turns out their guy used a tape measure from the hardware store, held it crooked, and was off by 0.02 inches. That small error cost them $8,000 in lost hay and a new bearing housing, not to mention the downtime. So, yeah, getting this right isn’t just technical—it’s practical.
Let’s start with the basics: what a shaft diameter actually is. Unlike a round rod you’d find in a hobby store, most real-world shafts aren’t perfectly smooth or uniformly round. They have machining marks, minor wear from use, or a slight taper along their length to fit a bearing or a hub. That means if you measure only one spot, you might get a number that’s not the true nominal diameter you need. I always tell my team to measure at three different points along the shaft, and at two different angles at each point. Why angles? Because even a brand-new shaft isn’t a perfect geometric circle. Machining can leave it slightly out of round, and wear over time will exaggerate that. If you only measure along one line, you might pick up a high spot or a low spot that doesn’t reflect what the part is supposed to be.
Now, what tools do you need? You don’t have to drop thousands on a lab-grade caliper for most jobs, but you do need the right tool for the job. Let’s go from most common to more specialized, since that’s what most of my customers use.
First up: digital vernier calipers. This is the workhorse of small to medium shafts, and it’s the tool I recommend 90% of the time. A good 6-inch or 12-inch digital caliper is affordable, easy to read, and accurate to 0.001 inches (or 0.02 millimeters, if you work in metric). How to use it right? First, zero the caliper on a flat surface—don’t assume it’s already set, because a dropped caliper can throw off the zero. Then, open the jaws wide enough to fit around the shaft, close them gently—don’t squeeze so hard that you bend the caliper or deforms the shaft, because soft metals like aluminum will give way, and you’ll get a wrong measurement. Slide the jaws to the spot, lock the caliper if it has a locking screw, and write down the number. Remember: measure at three points (the end, the middle, and the point where the shaft fits into the hub) and two angles at each point. For example, at the end, measure top to bottom, then rotate the shaft 90 degrees and measure left to right. If those two numbers are within 0.002 inches, that’s a good reading; if not, the shaft is worn or out of round, and you need to use the average of the two, or adjust your order accordingly.
Wait, what if you don’t have a digital caliper? A dial caliper works the same way, just with a needle that moves across a dial instead of a digital screen. They’re a little more rugged for jobsite use, which is why some of my construction customers prefer them. Just make sure you read the dial correctly—don’t mix up the inch and millimeter scales if you work with both. And never use a ruler or tape measure for this. I’ve seen guys use a tape measure to wrap around a shaft and divide the circumference by pi, but that’s only accurate if the shaft is perfectly round, and even then, tape stretches, so you’ll get an error. Rulers are way too imprecise for anything that needs to fit into a bearing or a gear—they’re fine for cutting wood, not for precision machining parts.
Next up: micrometers. This is the go-to tool for high-precision shafts, or shafts larger than 12 inches. A micrometer is more accurate than a caliper—most are accurate to 0.0001 inches, which is 10 times more precise. That’s the tool we use here at our shop when we’re making custom shafts for aerospace or medical equipment, where even a 0.001-inch difference can cause a part to fail. How to use a micrometer? First, calibrate it on the standard that comes with it—most micrometers have a small metal bar you can set them against to make sure the zero is correct. Then, hold the frame of the micrometer in one hand, the spindle against the shaft, and turn the ratchet until it clicks—again, don’t squeeze, because that will deform the shaft and throw off the reading. For large shafts, you might need a outside micrometer that’s 12 inches or longer, or even an inside micrometer if you’re measuring a hollow shaft, but for most solid shafts, the standard outside micrometer works. The big mistake I see here is people reading the micrometer wrong—don’t forget to add the number on the sleeve to the number on the thimble. If you’re working in metric, it’s a little simpler, but the same rule applies: calibrate, don’t over-squeeze, and check multiple points.
What if you have a really large shaft—like 2 feet or more? A micrometer that big is expensive, and not many people keep one on hand. That’s where a diameter tape, also called a pi tape, comes in. This is a flexible measuring tape marked directly with diameters, not circumference. You just wrap it around the shaft, pull it tight (but not so tight you compress the surface), and read the diameter directly off the tape. The key here is that this only works if the shaft is perfectly round—if it’s out of round, the tape will give you an average, but not the actual diameter. So it’s a good tool for large, unused shafts where you don’t have a way to lift them onto a lathe, but not for precision fit parts. For really critical large shafts, we use a laser micrometer now— it’s a non-contact tool that shoots a laser across the shaft and measures the shadow to get a diameter, and it can measure every point along the shaft at once. But that’s a shop tool, not something most customers have at their facility, so I only mention it for when you need the absolute highest precision.
Now, let’s talk about the mistakes that trip everyone up, even when you have the right tool. First, measurement location. I can’t tell you how many times someone measures the very end of a shaft, right where the lathe cut off the excess, and that spot is not representative of the rest of the shaft. Shafts often have a slight taper—for example, a shaft that goes into a bearing might be 0.5 inches at the end, and 0.502 inches an inch back. If you only measure the end, you’ll order a bearing that’s too loose, and that’s a whole other headache. So always measure along the functional length—the part that actually fits into the bearing, gear, or pulley, not just the tip.
Second, shaft wear. If you’re measuring a used shaft to replace it, the wear will be lowest at the ends, right where the shaft is supported by bearings, and higher in the middle, where there’s more movement. So if you measure the middle of a used shaft, you’ll get a smaller diameter than you need—wait, no, actually, wait: when a shaft spins, the part that touches the bearing wears away, so the diameter gets smaller. So if you measure a used shaft, you need to measure the point where the fit is tightest—the point that’s most critical for alignment. If you measure a worn spot, you’ll order a new shaft that’s the same diameter, but it will be too big because the old one was worn down. That’s another common mistake I see all the time.
Third, cleaning the shaft. If there’s grease, dust, rust, or oil on the shaft, it will throw off your measurement, even with a caliper or micrometer. I always tell customers to wipe the shaft clean with a cloth (no paper towels, they leave lint) before measuring. If there’s light rust, you can use a light abrasive like steel wool to buff it off—just don’t scratch the surface more than you have to, because scratches can also affect the fit of the new shaft.
Now, what if you’re ordering a new shaft, not measuring an old one? The spec sheet will list the nominal diameter, but you should still ask for the tolerance—how much the diameter is allowed to vary. For example, a nominal diameter of 0.5 inches with a tolerance of +0.000 / -0.001 inches means the shaft can’t be bigger than 0.5, and can be as small as 0.499. But if you need a tight fit for a bearing, you’ll need a tolerance of +0.0005 / -0.0005, which is much more precise. That’s where the measurement practice I talked about earlier comes in—your machinist will measure at multiple points to make sure the shaft is within that tolerance.
Let me share a recent example to make this real. A customer came to us last month, needed 10 steel shafts for a conveyor system. They measured the old shaft with a tape measure, got 1.25 inches, and ordered from a different supplier. When the shafts arrived, they wouldn’t fit into the bearings. Their guy measured again, this time with a caliper, and found the new shafts were 1.248 inches—too small, because the supplier had used a nominal measurement, not the actual diameter. When they called me, I walked them through measuring: first, zero the caliper, clean the shaft, measure at three points along the functional length, two angles each. We found that the correct diameter was 1.250 inches with a tolerance of 0.001 inches, and we got them custom shafts that fit perfectly in three days. That’s why taking the time to measure right saves you from ordering the wrong part, wasting money, and slowing down your project.
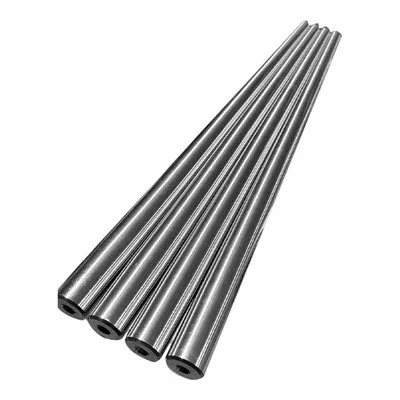
At the end of the day, measuring a shaft diameter isn’t hard—it just takes a little care and the right method. You don’t need fancy lab equipment, you just need to use your tool correctly, measure at multiple points, account for wear if you’re working with an old shaft, and clean the surface first. And if you’re not sure about your measurement, don’t guess—reach out. I’ve worked with hundreds of customers over the years, and I’d rather walk you through a correct measurement than have you order the wrong shaft and end up with downtime or wasted materials.
Stud&Bolt If you need precision shafts for your next project, whether it’s for a farm, construction, aerospace, or industrial machinery, we can help. We work with all material types, from steel and aluminum to stainless steel and custom alloys, and we can hold tight tolerances to fit your exact needs. We can provide measurements to match your specifications, or help you get the right numbers if you’re not sure how to take them. Just get in touch with our team to discuss your requirements, and we’ll make sure you get the right shaft for your application.
References
- Engineering Toolbox. (n.d.). Shaft Tolerances and Fits. Retrieved from industry technical resources for mechanical engineering specifications.
- American Society of Mechanical Engineers (ASME). (2020). B4.2 – Preferred Metric Limits and Fits. ASME International.
- Machinist’s Guide to Precision Measurement. (2021). Industrial Press, Inc.
Kunshan Haizhijie Precision Hardware Co., Ltd.
As one of the most professional shaft manufacturers and suppliers in China, we’re featured by quality products and good price. Please rest assured to buy customized shaft made in China here from our factory. Also, pricelist is available.
Address: No. 367, Kangzhuang Road, Zhou City Town, Kunshan City, Jiangsu Province, China
E-mail: wzhshui@sina.com
WebSite: https://www.hzhjmetal.com/
